Distributing your Application as an executable JAR file

Distributing your Application as an executable JAR file


A JAR (Java ARchive) is a way of packaging together all of the resources associated with a program (class files, images, sounds, etc.). Putting your program in a JAR allows it to be distributed as a single executable file, saving space and simplifying the download process. The information in this tutorial applies to Java version 1.2 or higher. For more information about JAR files, follow Sun’s tutorial. To learn about signing the JAR and Java Web Start.


A simple example. Let’s say we wanted to distribute the simple program Hello.java as a JAR. First, we create a text file named Hello.mf which contains:


Manifest-Version: 1.0
Main-Class: Hello
Then, we create the archive by typing:
jar cmf Hello.mf Hello.jar Hello.class Hello.java
and run it by typing:
java -jar Hello.jar
The file Hello.jar can now be downloaded and executed.


Creating an executable JAR file. Here is the general procedure for creating an executable JAR:


  1. Compile your java code, generating all of the program’s class files.


  2. Create a manifest file containing the following 2 lines:
    Manifest-Version: 1.0
    Main-Class: name of class containing main
    The name of the file should end with the .mf suffix. It is important that the file ends with a blank line.


  3. To create the JAR, type the following command:
    jar cmf manifest-file jar-file input-files
    The input-files must include any class files, images, sounds, etc. that your program uses. Optionally, you can include the program’s .java files in the JAR. See below for adding directories ot the JAR.


  4. To view the contents of the JAR, type:
    jar tf jar-file


  5. Execute the application from the command line by typing:
    java -jar jar-file
    If the application is GUI-based, you can also launch it by double-clicking the JAR file.

Accessing resources in a JAR. In general, the first step in accessing a JAR resource involves creating a URL. This might require modifying your program. For example, you can no longer use the following code fragment to read in an image that is stored in a file as follows


Image image = Toolkit.getDefaultToolkit().getImage(filename);
Instead, create the URL object using
URL url = getClass.getResource(filename);
Image image = Toolkit.getDefaultToolkit().getImage(url);
Or, if the code is in a static method of class X, then create the URL with
URL url = X.class.getResource(filename); 
Now, the resource can be accessed the same way, regardless of whether it is in a JAR or the current directory. See the method 
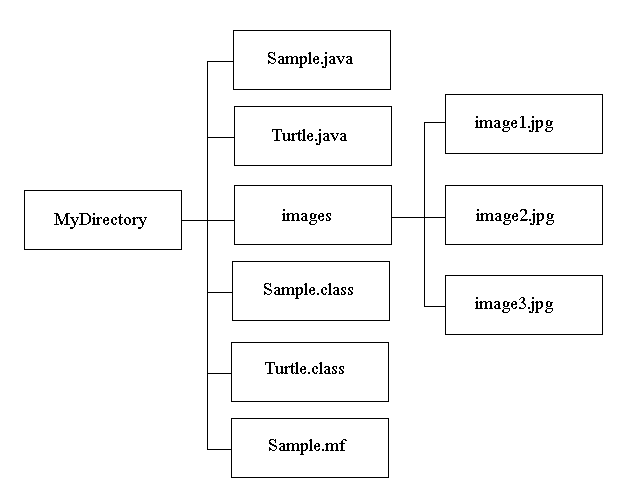
play(filename) in StdDraw.java for an example involving audio clips, and and the constructor In(String s) in In.java for an example involving text files.

JAR Subdirectories. The JAR format also support storing files in a directory structure. Consider a program Sample.java, which uses the Turtle Graphics interface to display a collection of pictures stored in a subdirectory called images. Our working directory looks like:


The Manifest should read:


Manifest-Version: 1.0
Main-Class: Sample

To create the JAR, type:


jar cmf Sample.mf Sample.jar Sample.class Turtle.class Sample.java Turtle.java images

The contents listing appears as:


META-INF/
META-INF/MANIFEST.MF
Sample.class
Turtle.class
Sample.java
Turtle.java
images/
images/image1.gif
images/image2.gif
images/image3.gif

Notice that the directory structure is still preserved (the META-INF directory is created to hold the manifest and other general information about the JAR).


yWorks Ant Explorer Eclipse Plugin

Eclipse Integration


yWorks Ant Explorer is available as a plugin for the popular Java IDE Eclipse. It supports both the visualization and execution of Ant build scripts.


Installation


You can install the plugin by using Eclipse’s integrated Update Manager, which is available via the menu items “Help” – “Software Updates” – “Find and Install.”
A “New Remote Site” with URL “http://www.yworks.com/eclipse/update” has to be created.


Update Manager Update Manager Update Manager Update Manager


Alternatively, the Jar archive containing the Eclipse plugin can be directly downloaded and extracted into the respective directory (normally, %ECLIPSE_HOME% or ${user.home}/.eclipse).


Usage


The views of yWorks Ant Explorer are opened whenever the visualization of an Ant build script is started via its menu item from the “Package Explorer.”


Furthermore, the views are automatically updated whenever they are visible and an Ant build script is opened inside the editor view.


The visualization view comprises two parts; one view holds the graph that displays dependencies between targets, whilst the other view displays the properties. Edges between properties denote that they are being used in other properties.


Further information for each view can be found in our documentation.


Restrictions


  • Build processes are executed inside the same JVM that runs Eclipse.
    This can lead to side effects, for example regarding the class path or open file handles, etc.
    For problematic build scripts, we recommend that you use the yWorks Ant Explorer stand-alone version instead.

  • “Unesthetic” Icons
    Unfortunately, Eclipse Version 3.0.1 cannot render transparent PNGs in the menu bar. Lower-quality GIFs are used to replace them.

Generating Code Automatically Using Custom code Template In Eclipse

One of the good features of Eclipse is its auto fill property. This can be further enhanced using its code template feature. Creation of code templates is necessary to improve development productivity. Templates add consistency and uniformity to your code. Eclipse has so many ready-to-use templates. And you can create your own code templates according to your requirements. To use these templates just type the starting characters of the template and then press “CTRL+SPACE”. For example in Ecipse IDE type “tr” and then press “CTRL+SPACE”, It will add “try-catch” block to the code.


This article will guide you to create your own code template. Let us take an example to generate a “if-else” template with one “else if” condition.


  1. Go to the Templates ( Window –> Preference –> java–> Editor –> Templates) .

  2. Click “New”. A window similiar to below appears.

  3. 1.JPG


  4. Fill the details as shown above.

  5. Click “OK”.

  6. Now you can use your custom template in the program like any other template by pressing “CTRL+SPACE” as shown in the below given screenshots.

2.JPG


3.JPG


Generating Undeclared Methods

Eclipse has many features that make the job of a programmer easy. Here a simple project is created and will use few of those features to demonstrate how easy programming can be using Eclipse. Most of the new programmers, ignore these and prefer to code everything themselves which is time consuming.


  1. First creating a package: really simple. Right click the project name and click “ New ” – > “ Package” . Name it as “car” .


  2. Creating a class in it named “ Car ” and defined 2 private attributes namely “ doors ” , “ seats ” . Now generate getters/setters for that. Eclipse can generate those for us. In the Source menu, click “ Generate getters and setters ” .


  3. Now make another class in the same package named “ Honda ”. Create a “ main ” method in this class. Eclipse will generate “ main ” method once you check the “ generate main method ” checkbox while creating the class.

  4. Also to make Car class to be the superclass for “ Honda ” class. Click “ Browse ” button against superclass field of the class declaration window. As “ Car ” class is under package “ cars ”, parent class for Honda will be “ cars.Car ”.


Eclipse will generate the following code:


package cars;public class Honda extends Car {
 
/**
 
* @param args
 
*/

 
public static void main(String[] args) {
 
// TODO Auto-generated method stub
 
}
 
}

In class Honda, following lines of code are added.


	Car car1 = new Honda(); car1.setSeats(4);
 
car1.setDoors(2);
 
System.out.println(car1.calcNum());

“ car1.calcNum() ” shows error as this method is not declared in the class Car. One way is to go back to class Car and declare the method. Simple way is to click the red cross on the left of the problem line and Eclipse will give you the options for automatically generating the required method in the required class. After generating the required method, Write code according to the requirement in the generated method.


Review the code:


package cars;public class Car {private int doors;private int seats;
 
public int getDoors() {
 
return doors;
 
}
 
public void setDoors(int doors) {
 
this.doors = doors;
 
}
 
public int getSeats() {
 
return seats;
 
}
 
public void setSeats(int seats) {
 
this.seats = seats;
 
}
 
public Object calcNum() {
 
return this.getDoors() * this.getSeats();
 
}
 
}
 
package cars;
 
public class Honda extends Car {
 
public static void main(String[] args) {
 
Car car1 = new Honda();
 
car1.setSeats(4);
 
car1.setDoors(2);
 
System.out.println(car1.calcNum());
 
}
 
}

Name Obfuscation Using yGuard


Name Obfuscation Using yGuard


yGuard is a Java byte code obfuscator that can be used for effective name obfuscation of Java byte code. It is bundled with every yFiles distribution (see the yGuard README file), and is also freely available.


Since yGuard fulfills the obfuscation requirements of the yFiles license terms, it is a perfectly suited tool to protect the yFiles part of any yFiles-based application. (Of course, it is also the perfect tool to protect the entire application.)


yGuard is available as an Apache Ant task for easy integration into any Ant-based build process. Example A.2, “Using the yGuard Ant task” shows an Ant build file’s target that obfuscates the yFiles part of an application.


Note


The example uses yGuard 2.0 syntax.


Example A.2. Using the yGuard Ant task


<!– Obfuscates the yFiles part of an application (i.e., y.jar) and adjusts –>
<!– the non-yFiles part given by the application’s Jar file accordingly. –>
<target name=”obfuscate” depends=”jar”>
  <!– yGuard Ant task. –>
  <taskdef name=”yguard”
           classname=”com.yworks.yguard.YGuardTask”
           classpath=”${yGuardJar}”/>
  <!– Integrated obfuscation and name adjustment… –>
  <yguard>
    <!– Obfuscate the yFiles Jar. –>
    <inoutpair in=”${yJar}” out=”${yJarObf}”/>
    <!– While obfuscating, adjust the names of yFiles features in the –>
    <!– application’s Jar file. –>
    <inoutpair in=”${myAppJar}” out=”${myAppJarObf}”/>
   
    <!– …using the yGuard ‘rename’ task. –>
    <rename logfile=”${obfuscationLog}” replaceClassNameStrings=”true”>
   
      <property name=”obfuscation-prefix” value=”myprefix”/>
      <keep>
        <class classes=”private” methods=”private” fields=”private”>
          <patternset>
            <include name=”com.mycompany.myApp.**”/>
          </patternset>
        </class>
      </keep>
     
      <!– Adjust all occurences of now obfuscated names in plain-text –>
      <!– files, too. –>
      <!– For example, the names of property resource bundle files for –>
      <!– yFiles classes must be adjusted to reflect the yFiles class’s –>
      <!– obfuscated name. –>
      <adjust replaceName=”true”>
        <include name=”y/**/*.properties”/>
      </adjust>
     
    </rename>
  </yguard>
</target>


For detailed explanations of yGuard’s Ant syntax, please see the yGuard manual.


Adjusting Names


Any code that makes use of yFiles features, or more specifically uses names of yFiles features, needs to be adjusted to their new names. This adjustment is automatically performed for all Jar files given to the yGuard obfuscation machinery using the <inoutpair> element.


Using yGuard’s <adjust> element (inside the <obfuscate> element), any additional plain-text files that are not processed by the obfuscation itself, e.g., resource files, can be adjusted in several ways, too. For example, a file’s path, its name, and also its content are subject to possible modifications.


Checking Obfuscation Success


During the obfuscation process, yGuard optionally generates a log file that contains all original names, their new obfuscated names, and also additional statistical information in XML-based syntax. The log file is an important document, since it shows the mapping of original to obfuscated names. To display the information nicely, yGuard offers a convenient reverse name look-up feature.


Example A.3, “yGuard’s command line syntax” shows the command line syntax to invoke yGuard’s reverse name look-up. Given a generated log file (or its GZip compressed variant), both the original class, method, and field names and their obfuscated counterparts are conveniently presented in a tree view, as depicted in Figure A.1, “yGuard’s reverse name look-up view”.


Example A.3. yGuard’s command line syntax

java -jar yguard.jar [yGuard_obfuscation_log_file.xml[.gz]]


Figure A.1. yGuard’s reverse name look-up view


yGuard's reverse name look-up view.

To ensure that the yFiles API has been properly obfuscated, all public and protected class, method, and field names must be present in the tree view presented by yGuard’s reverse name look-up feature. In other words, all names of such features must have been replaced by new names that are distinctly different from their originals.


Tutorial Demo Code


For an example on how to obfuscate the yFiles part of a yFiles-based application using yGuard, see the obfuscation demo’s Ant build file (included with the yFiles Complete distribution). The build file also shows how to adjust the occurences of obfuscated names of any yFiles features in properties files.

YGuard build Sample

<?xml version=”1.0″ encoding=”UTF-8″?>
  <project name=”ESI” default=”yguard” basedir=”.”>
    <!– edit the following lines to your needs –>
    <target name=”init”>
      <property name=”project_name” value=”ESI”/>
      <property name=”srcDir” value=”src/main”/>
      <property name=”classDir” value=”classes”/>
      <property name=”jar” value=”${project_name}.jar”/>
      <property name=”obfjar” value=”${project_name}_obf.jar”/>
      <property name=”renamelog” value=”${project_name}_renamelog.xml”/>
      <property name=”shrinklog” value=”${project_name}_shrinklog.xml”/>    
      <mkdir dir=”${classDir}” />
      <property name=”lib” value=”E:/Projects/ESI/lib” />
      <path id=”myclasspath”>
     <fileset dir=”${lib}”>
       <include name=”*.jar”/>
     </fileset>
   </path>
    </target>

    <target depends=”jar” name=”yguard”>
      <taskdef name=”yguard” classname=”com.yworks.yguard.YGuardTask” classpath=”D:\yguard-2.2.0\lib\yguard.jar”/>
      <!– the following can be adjusted to your needs –>
      <yguard>
        <inoutpair in=”${jar}” out=”${obfjar}”/>
        <shrink logfile=”${shrinklog}”/>
        <rename logfile=”${renamelog}”>        
          <keep>
           <package>
             <patternset>
               <include name=”org.apache.*”/>
             </patternset>
           </package>
          </keep>
        </rename>
      </yguard>
    </target>
    <!– compile –>
    <target name=”compile” depends=”init”>
      <javac classpathref=”myclasspath” srcdir=”${srcDir}” destdir=”${classDir}”/>
    </target>
    <!– create .jar –>
    <target name=”jar” depends=”compile”>
      <jar jarfile=”${jar}” basedir=”${classDir}” includes=”**”>
        <fileset dir=”E:/Projects/ESI/resource/conf”>
          <include name=”*.xml”/>
        </fileset>
      </jar>
    </target>
    <!– removes all that has been built –>
    <target name=”clean” depends=”init”>
      <delete dir=”${classDir}” includeEmptyDirs=”true” />
    </target>
  </project>
  <!– end file build.xml –>

yGuard – Java™ Bytecode Obfuscator and Shrinker

yGuard is a free Java bytecode obfuscator and shrinker that improves your software deployment by prohibiting unwanted access to your source code and drastically shrinking the processed Jar files at the same time.


Features


  • yGuard is absolutely free! Contrary to expensive commercial products of our competitors providing the same amount of features as yGuard or less, yGuard is free.

  • yGuard is an Ant task! Existing tools use proprietary mechanisms to invoke or configure the task of obfuscation. As an Ant task, yGuard can be seamlessly integrated into your deployment process using XML syntax.

  • yGuard provides highly configurable name obfuscation that will protect your intellectual property from reverse engineering.

  • yGuard provides elaborate code shrinking functionality through dependency analysis.

  • yGuard 2.0 offers a new powerful and easy to use XML syntax that allows the effortless definition of code entities e.g. based on pattern sets or inheritance.

  • yGuard will correctly obfuscate and shrink programs that depend on external libraries.

  • yGuard can automatically rename and adjust textual resource files according to the obfuscation scheme.

  • yGuard can scramble and unscramble or shrink line number table information. This means that debugging an obfuscated program is still achievable without weakening the obfuscation.

  • yGuard can create patches! During each obfuscation run, yGuard produces XML output that can be used to create subsequent patches of already deployed obfuscated applications.

  • yGuard supports JDK 1.5 features and correctly obfuscates classes compiled with its new features.

Why Use yGuard?


  • Name Obfuscation: protects your .class files from reverse engineering by replacing package, class, method, and field names with inexpressive characters. If afterwards the obfuscated .class files are decomplied, it will be extremely diffcult to derive the original purpose of the obfuscated code entities.
    As an additional side-effect, name obfuscation will significantly reduce the size of your application, depending on the chosen mapping scheme.

  • Code Shrinking: drastically reduces the size of the input Jar files if your application does not use all of the contained bytecode.
    The shrinking engine analyzes the bytecode of all input Jar files in order to determine which code entities can not be reached from a set of given code entry points. These obsolete code fragments (either entire classes or single methods and fields) will then be removed by yGuard. If you use any third party libraries, you will probably benefit a lot from the yGuard shrinking engine, since applications usually do not use all of the functionality provided by an external library and a large fraction of the contained bytecode and resources can be safely removed.

SecureCRT v5.5.2 crack key keygen

SecureCRT gives you an encrypted Secure Shell (SSH1 and SSH2) session with servers and devices. For SSH, Telnet, Telnet/SSL, and other protocols, SecureCRT’s tabbed sessions reduce desktop clutter and make it easy to switch between sessions and organize groups of connected sessions. Extensive session management and customization features include named sessions, and multiple-session windows. Choose from a wide range of emulations including VT100, VT102, VT220, ANSI, SCO ANSI, Wyse 50/60, Xterm, and Linux console. SecureCRT can help you save valuable time by automating routine configuration tasks with powerful scripting capabilities.


SecureCRT 5.5 offers new time-saving features, with a script recorder and the ability to open multiple sessions or folders on startup using auto session. Additional enhancements include custom logging options, support for generating and converting private keys in OpenSSH format, improved integration with SecureFX®, and support for Windows Vista.


New productivity enhancements:


  • Script recorder: Quickly create a script to automate routines using the new script recorder, which records keystrokes, including function keys, and then generates a VB script.

  • Improved auto session: With “Use auto session” enabled, you can now select a single session, multiple sessions, or folders of sessions to automatically connect on startup.

  • Cache passwords: SSH2 session passwords can be cached like passphrases. SecureCRT and SecureFX can share passwords while either application or the Activator utility is running.

Improved ANSI color with color schemes: When using ANSI color, you can now select a color scheme to replace the standard white foreground and black background.


Expanded logging options with custom log data: Custom log data gives you the ability to specify strings to be logged upon connect, disconnect, and on each line. Parameter substitutions for session and date information are supported.


Support for OpenSSH format keys: You can now generate keys in OpenSSH format or convert existing VanDyke Software format private keys to OpenSSH format, allowing you to use the same keys with other Secure Shell clients.


Support for [email protected] compression: When [email protected] compression is specified, compression starts after authentication, preventing unencrypted passwords from being cached by the zlib library.


Additional tab support: Display the list of tabs on the menu using the MENU_TAB_LIST1 custom menu item. A new script function, GetScriptTab, returns the tab from which the script was started.


Windows Vista support: SecureCRT has been tested under Windows Vista, so when you are ready to move to Vista, SecureCRT will be compatible.


Download HERE: SecureCRT v5.5.2 crack key keygen

SQL Hacks (CHM)


<<SQL Hacks >>


Book description


Whether you’re running Access, MySQL, SQL Server, Oracle, or PostgreSQL, this book will help you push the limits of traditional SQL to squeeze data effectively from your database. SQL Hacks offers 100 hacks — unique tips and tools — that bring you the knowledge of experts who apply what they know in the real world to help you take full advantage of the expressive power of SQL. You’ll find practical techniques to address complex data manipulation problems.


Download CHM

MySQL Stored Procedure Programming

<<MySQL Stored Procedure Programming>>


Book description


MySQL Stored Procedure Programming covers a lot of ground. The book starts with a thorough introduction to stored procedures programming and functions, covering the fundamentals of data types, operators, and using SQL in stored procedures. You’ll learn how to build and maintain stored programs — covering transactions, stored functions, and triggers — and how to call and use MySQL-based stored procedures in a variety of languages, including PHP, Perl, Python, .NET, and Java. This book, destined to be the bible of stored procedure development, is a resource that no real MySQL programmer can afford to do without.


MySQL Stored Procedure Programming CHM下载


书中配套代码的下载


书中样例数据库的下载